
User Journey: View Asset Overview Page
Goal:
To view all asset-related information, including visual summaries and detailed listings of different asset types.
Entry Point:
User clicks on the “Asset” option under the “Organizer” tab.
Steps:
- User selects the “Asset” tab from the Organizer menu.
- System navigates to the Asset Overview Page.
- User sees a graph displaying assets by name and corresponding amount.
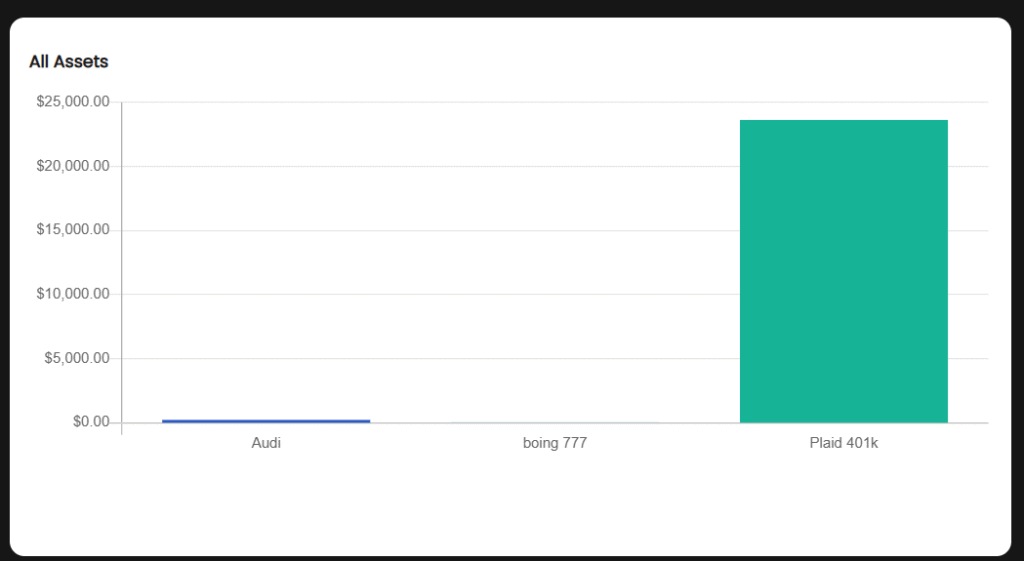
4. User views a card showing the total value of all assets.

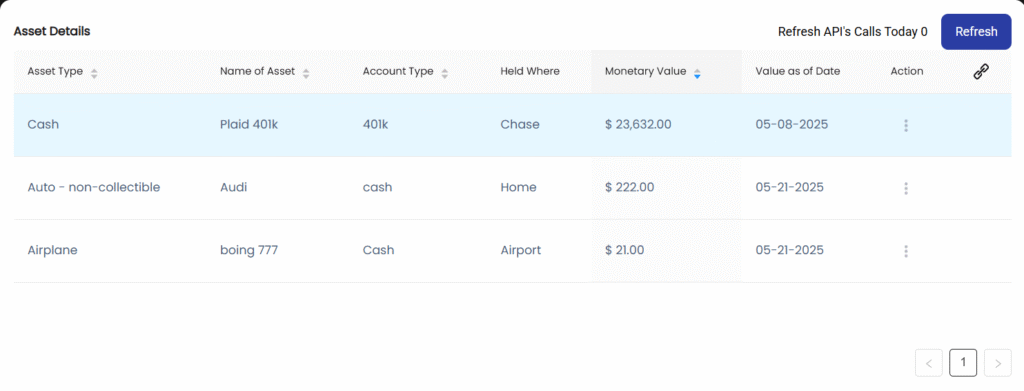
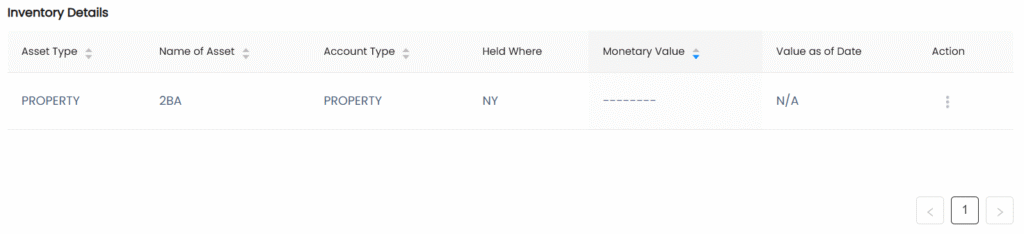
5. User scrolls to see the listing table of asset details.
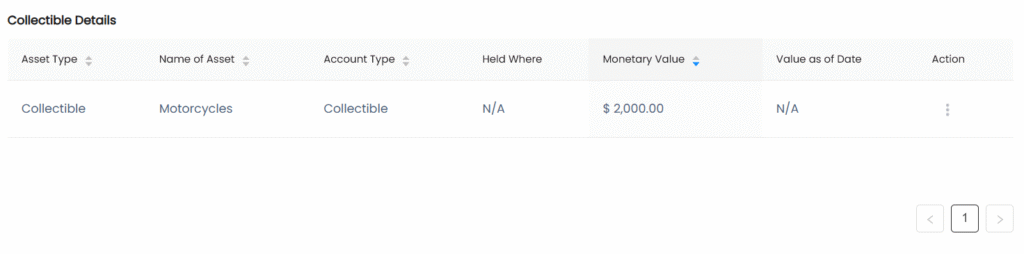
6. User views the listing of Collectibles.
7. User reviews the Inventory listing, showing tangible items owned.
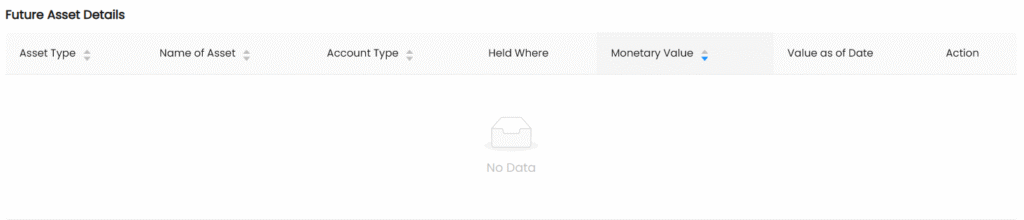
8. User checks the Future Asset listing, The remaining amount of the asset assigned to the goal will be listed here.
User Journey: Add Asset #
Goal:
To add a new asset by selecting its sub-type under Physical or Investment and providing relevant details.
Entry Point:
User clicks the “Add Asset” button on the Asset Overview Page.

Steps:
- User clicks the “Add Asset” button.
- System displays a list of sub-types grouped under Physical and Investment (e.g., Real Estate, Vehicle under Physical; Stocks, Bonds under Investment).

3. User selects a sub-type from either category.

4. User clicks on (+) to as assets.

5. A few forms appear with fields relevant to the selected sub-type (e.g., Name, Value, Date Acquired, Notes).
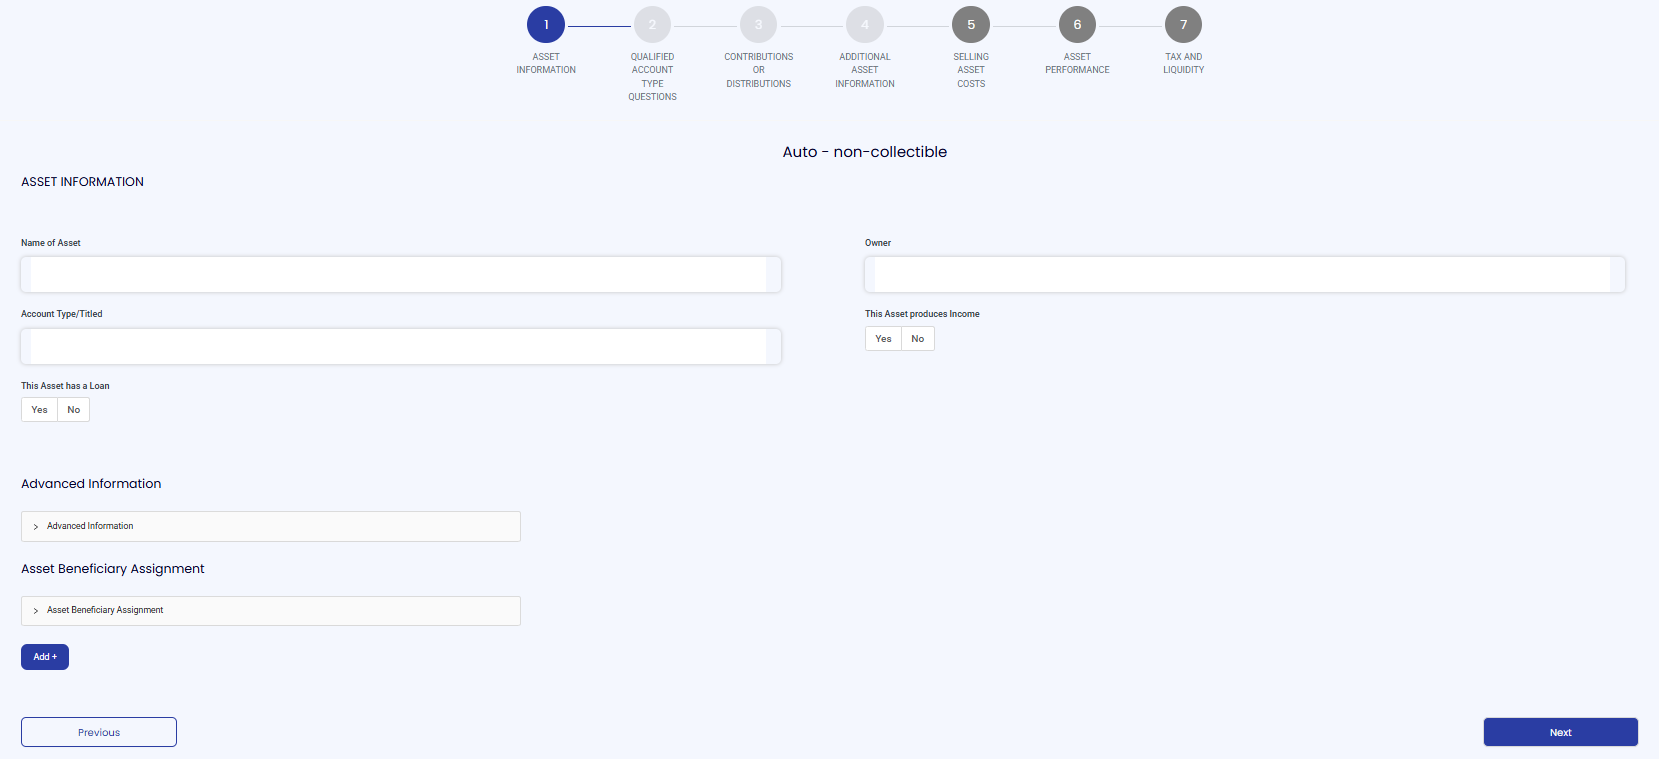
6. User fills in the asset information.
7. System adds the asset, updates the total value, and refreshes the asset list and graph.


